

If you’ve been experimenting with a digicam, you might be interested in learning how to take the IR filter out of a digital camera. An IR filter is present in many of the best digital cameras as they are not always required. However, if your digital camera captures grainy images, it may lack an IR filter, then read on to discover more.
The camera’s hardware warranty is void if the IR filter or shielding glass is removed.
It’s also crucial to keep in mind that removing the IR filter changes the optical path of the camera, which could make it difficult to focus your lens correctly.
Working in a clean industrial environment is recommended to reduce the danger of harming the image sensor. Or introducing dust to the camera because removing the IR filter exposes your camera’s image sensor and components. “Cleaning the imaging surface of your camera” has cleaning instructions for the IR filter and safety glass.
How To Remove The IR Filter From A Digital Camera? Are you sick of seeing the world in dull, uninteresting colors? Concerned about your eyes’ inability to see the light between 400 and 700 nm? It’s likely that you already have a perfectly functional infrared imaging device nearby and are simply unaware of it. Here’s how to upgrade your standard digital camera to fully utilize its infrared capabilities. A little screwdriver, some lighting filters, and steady hands are all required, so you’ll be taking gorgeous, surreal IR images in no time.
Table of Contents
To remove the IR filter:
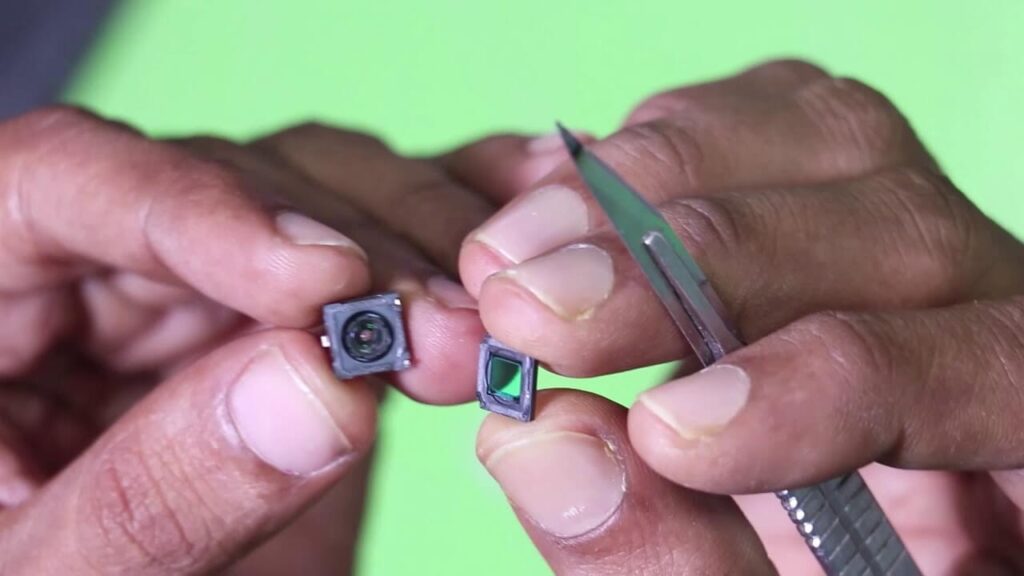
The only way to remove an IR filter from a camera where the filter is attached to the lens holder is to destroy the filter. Before attempting to remove the filter, it is advised that you altogether remove the lens holder from the camera.
For cameras with an easily detachable retainer for the IR filter:
- Take off the screws holding the plate on.
- Get rid of the retainer
- Get rid of the IR filter.
To replace the IR filter:
In cameras with removable retainers for the IR filter, the IR filter can be changed by screwing the retainer back on after placing the new filter inside.
Please make sure the side of the new filter with the AR coating is towards the sensor when you assemble it. Hold the filter at a 45–60 degree angle to find the side with the AR coating. The AR coating is visible on the side with a green reflection (a pink review indicates no layer).
To switch the IR filter:
You can get a new lens holder for Dragonfly2 cameras (ACC-01-5002 or ACC-01-5003). The benefit of doing this is that if you switch back to utilizing an IR filter in the future, you can replace the two lens holders.
You can purchase a separate M12 microlens holder for board-level cameras (ACC-01-5000 or ACC-01-5001).
If users want to change the IR filter for any other cameras, they have the following choices:
- Get an M12 microlens holder (ACC-01-5000 or ACC-01-5001).
- Invest in a new camera.
How do you remove the IR filter on a canon?

You can detach it from its frame by cutting the glued gasket around the IR-block filter because the glass is so thin, even a little force will be enough to break it. Clean the frame after removing the filter. If a replacement filter is used, place it in the structure and add a tiny dab of glue to each corner.
➔ Replacing the IR-block filter of a Canon EOS 550D Preparations:
- Remove the strap, eye cup, battery, and other accessories, as well as the lens.
- Apply a damp cloth or brush to clean the camera body’s exterior.
- For each screw, print the form, then fasten it with a double-sided strip or cut a strip out and use duct tape from the backside.
- To keep track of and prevent the loss, you can attach the heads of all screws to the video.
- Make sure the tabletop is spotless.
➔ Stuff you need:
- The handset (Canon EOS 550D)
- Sticky tape on a paper sheet helps you collect screws form to Print (pdf)
- Crosshead (Phillips) #00, small Flat (2mm), and Torx T6 screwdrivers or use an Exacto knife to remove its frame’s low-pass filter. A small break-tip knife could also be used, but it would be less practical.
- Vernier with depth probe caliper
- Sensor swabs, cleaning solution (Eclipse), and lint-free lens tissue.
- A can of air or a rocket air blower.
- A replacement filter is cutting your filter and some fine silicone glue. I used standard superglue, thin 2sec glue, which works fine, but only when the fit is tight. Because it has the bit filling capacity, avoid modern 1sec glue as it may result in a white haze deposition on the filter).
If you’re into photography with heavy lenses, check out our guide on the Best Camera Strap For Heavy Lenses to ensure comfortable support for your gear.
How do I remove the IR filter from my smartphone camera?
First, remove the smartphone camera’s infrared filter as a whiteboard is on the floor. The beginning of the CCD chip is the scar we need to eliminate. Enter the IRF address, and use a hot air gun to remove it and your piece. Please do not remove it from the bridge or the separation assembly. They are a lovely autofocus device with a lens that will walk if the bearing or camera is damaged.
You can use a heat gun to install the CCD of the chip, and you must be careful because if you touch it, it will be destroyed. Because the dust will stick to it and this mirror you can see it because it is an IR filter.
Heat to red or blue light and then rub a knife with a hot air gun out of this, and you resell camera calls with PVC tape. The filter has two working IRs inside a photo in front of the camera, and If you continue, you will filter about 95% infrared lamp.
How do you fix a stuck IR filter?
➔How does IR-cut operate?
The IR filter is turned on for the day, and infrared will be blocked, leaving only visible light. This guarantees that the image colors are not warped, creating a pure color representation identical to how the human eye perceives them. The IR filter is turned off at night or in low-light situations to allow IR and all other types of light to reach the sensor (CCD/CMOS). When there is enough light for the image sensor to process, the camera switches to black-and-white mode, which is more responsive to infrared.
➔FIX
If something has happened before, as was already explained, it is more likely to happen again. Try the following as a short- or long-term fix:
Step 1: Plug the camera back in after around 30 minutes of being unplugged; if you haven’t already tried that, did it work? Great! If not, proceed to Step 2.
Step 2: Hold a black cloth against the lens to completely obscure it; in contrast, the camera is turned on and linked to the recorder. After that, you’ll hear a “click” as the IR cut is activated because the sensor believes it to be “night time. You should hear another “click” when “night” changes back to “day” when you remove the cloth. Did it succeed? Great! If not, proceed to Step 3.
Stage 3: A powerful magnet, such as a neodymium magnet, is required for this step. Move the magnet in a circular motion around the camera lens to push or pull the IR cutaway. Did it succeed? Great! If not, proceed to Step 4.
Step 4: Only some IP cameras will be affected by this step. Some cameras, like Hikvision cameras, allow you to access that camera using a web browser and also let you reset the IR cut feature if you do this. You must log into the camera, go to settings, and reset the IR cut. Did it succeed? Great! If not, proceed to Step 5.
Step 5: This step won’t work with most cameras and is especially unlikely to do so if you use inexpensive cameras.
Look for a small hole or a small “pimple” within the camera housing. Push and hold for at least 15 seconds; the camera will reset to its factory settings and occasionally fix the IR cut. Some cameras may have a reset button buried within the camera housing.
Do all cameras have infrared filters?

Yes, The infrared blocker in most digital cameras (opens in a new tab) is fantastic for regular photography but useless for infrared work. Don’t try it at home because removing the filter from the sensor is a complicated and expensive process.
An infrared filter, like the Hoya Infrared R72(opens in a new tab), provides a unique solution. These IR filters run about £35 / $57 for small filter sizes, with prices rising for larger filter diameters. They screw into the front of the lens, and the filter will only let infrared light through while blocking the most visible light. You’ll get good images, but you’ll need to change how you shoot because the filter will be black and dense.
How much does it cost to convert a camera to infrared?
Depending on the conversion method you select. Converting a camera to infrared capture can cost as little as $300, which is inexpensive compared to the price of our cameras and lenses.
You can choose to buy a brand-new camera that has already been converted from a conversion service provider like LifePixel. That is the business that professional photographers like Nevada Wier suggest, or you can choose to restore an older camera that you don’t use very often.
We asked Daniel Malkin, co-owner of LifePixel, to outline the fundamentals of changing a camera to infrared. Or to simplify the procedure for photographers interested in pursuing this creative option, full-spectrum capture.
REFERENCES:
- https://www.wikihow.com/See-Infrared-Light
- https://en.wikipedia.org/wiki/Infrared
- https://en.wikipedia.org/wiki/Thermal_radiationr
- https://en.wikipedia.org/wiki/Electromagnetic_spectrum
- https://en.wikipedia.org/wiki/Infrared_vision
- https://ipcamtalk.com/threads/solution-for-fixing-ir-filter-stuck.36043/
- https://community.ui.com/questions/Stuck-IR-cut-filter/a493ed82-b0ae-4b46-90f7-e6bcf60481e7
- https://www.cctvforum.com/topic/19814-ir-cut-filter-stuck-can-i-fix-this/
- https://www.adorama.com/alc/modify-your-your-digital-camera-for-infrared-photography